You Picked the Wrong Tile. Here's How to Fix It Without Spending $10K+
(And the product that saved my bathroom renovation)
You did everything right. You pulled samples. You made a mood board. You committed.
Then you walked into the finished bathroom and felt that specific, sinking feeling: this is not what I wanted.
That's where I found myself mid-renovation — standing in a bathroom I'd designed remotely, looking at checkerboard tile that read chaotic and pink-toned instead of the clean, spa-like classic I'd envisioned.
Here's what I learned about how to fix a tile mistake — and why it doesn't have to cost a fortune.
Why Tile Looks Different Installed Than In Samples
The short answer: sample size.
I received 2-tile samples from my supplier. Both read as white/neutral in that small format. Installed across an entire floor and wall? They pulled warm — visibly pink and yellow-toned — and the checkerboard pattern that looked timeless in my head looked busy and loud in real life.
The rule I didn't follow: Always request samples large enough to simulate coverage. A 1'×1' board, with the tile actually adhered, gives you a real read on tone, pattern repeat, and how the grout interacts with the color. Small samples lie. Large samples tell the truth.
This is the kind of mistake that's easy to avoid — and expensive to fix after the fact.
What It Actually Costs to Redo Tile (Spoiler: A Lot)
My first call was to the contractor to get a number on pulling and replacing the tile.
The number: $13,000+ in labor alone. That's before the cost of new tile.
This wasn't remotely in budget, and the timeline didn't allow for it either. So I had two options: learn to love the tile I had, or find a creative solution.
I couldn't love the tile. So I found a solution.
The Fix: Concretta Plaster Over Existing Tile
A few weeks earlier, I'd seen a LoneFox "no demo reno" on Instagram that stuck with me. He resurfaced a bathroom without touching the original tile — and the transformation was dramatic.
That led me to Concretta, a water-resistant plaster that applies directly over existing tile. It comes in a wide range of neutrals and is fully water-resistant when properly sealed.
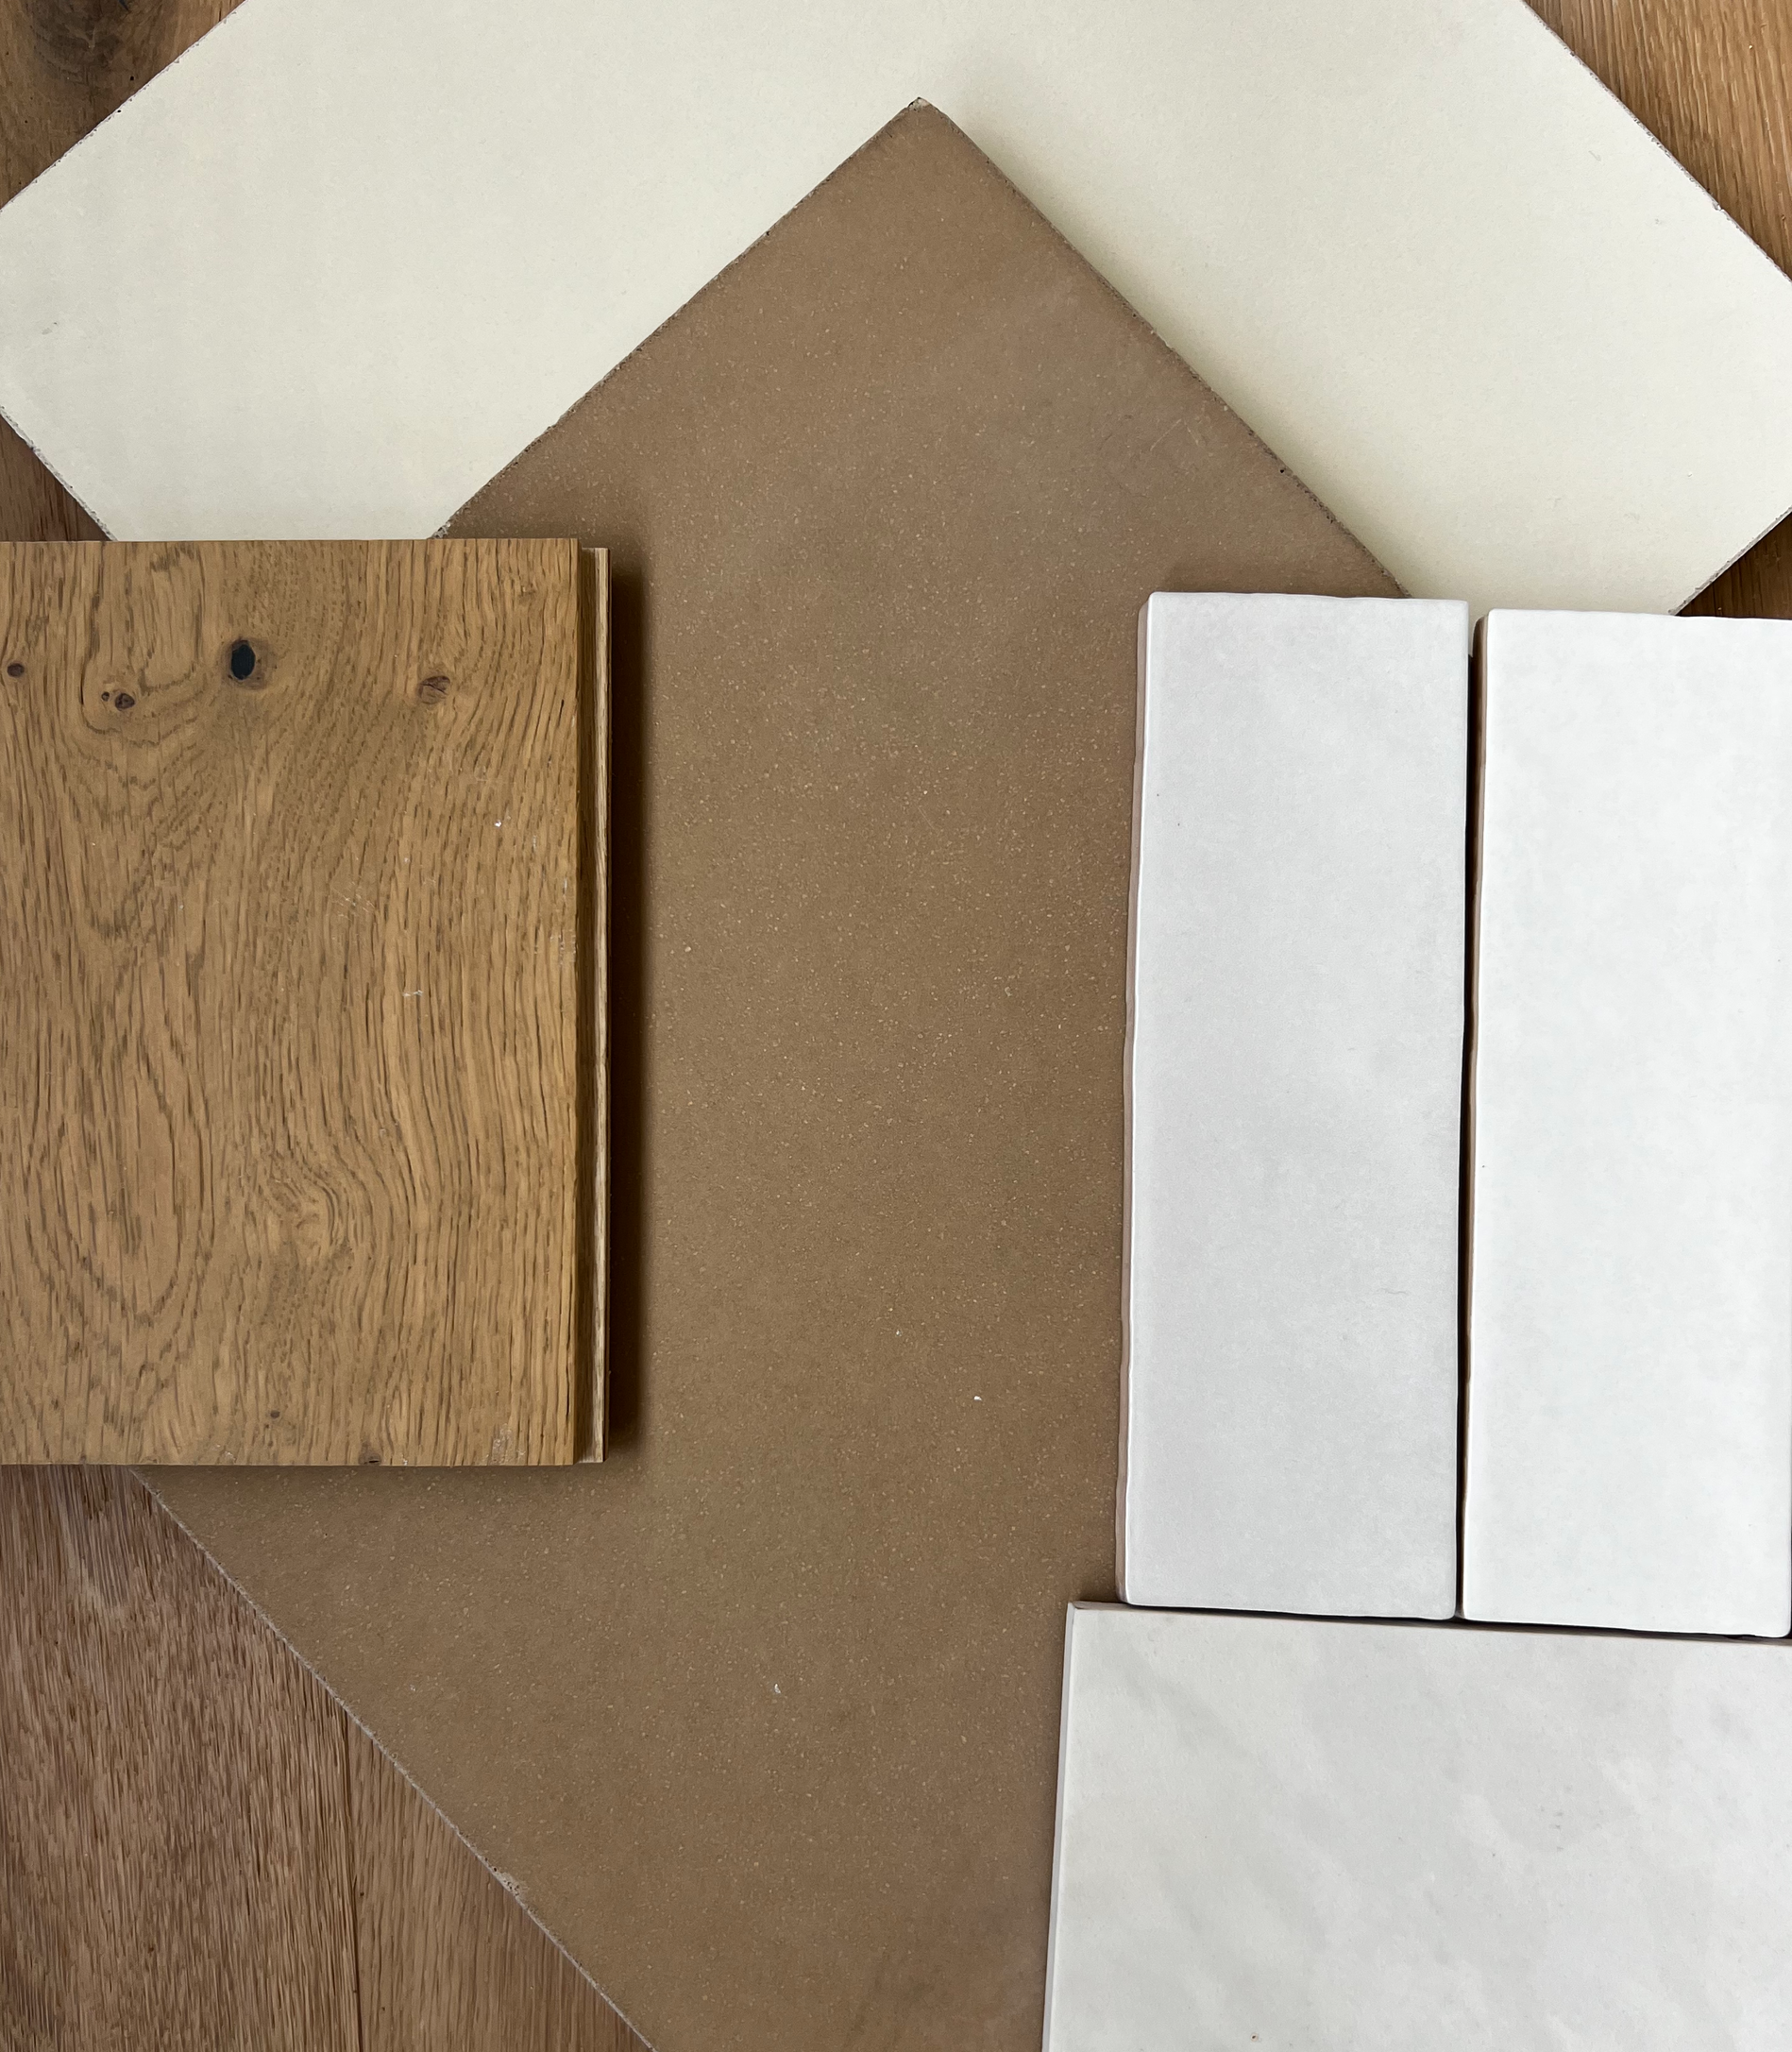
Here's where I almost made the same mistake twice: the Concretta colors on the website looked nothing like they did once I brought physical samples into the bathroom. What read as a warm neutral online pulled almost cool grey in my space + what read really orange tone on the website (Sandstone) looked the most neutral in my space.
The only thing that actually tells you how a material will look is a physical sample, in the room, under your lighting. No exceptions.


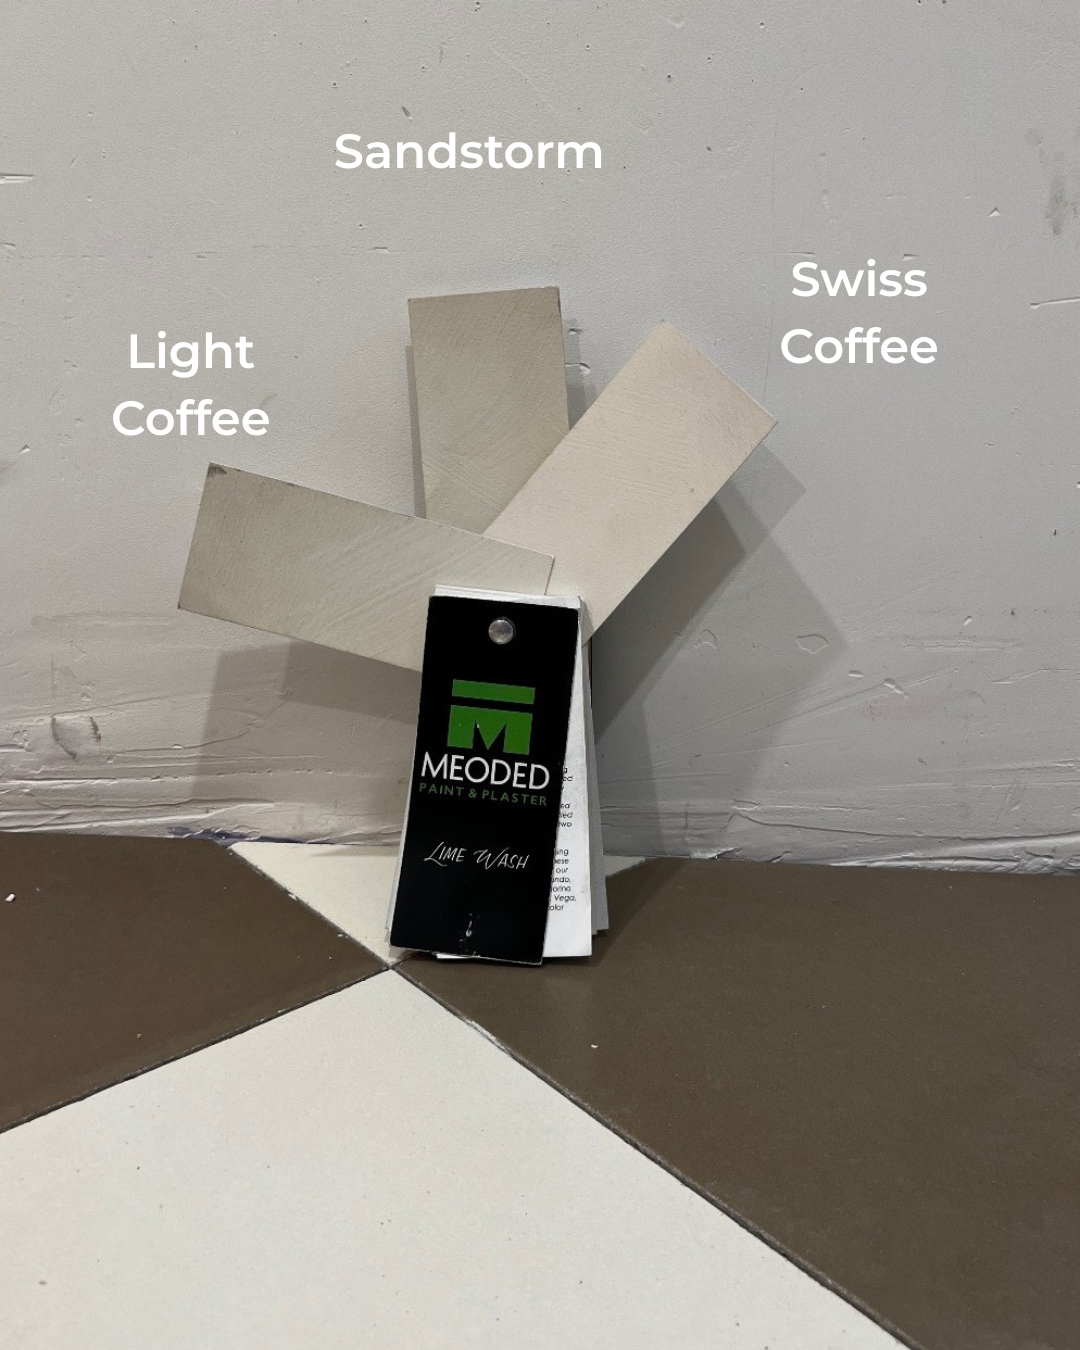
Ultimately, I went with Sandstone + diluted it by 25% just to ensure that it would be light/neutral and not compete with the busy floors.
A few things worth knowing:
- It comes in a wide range of neutrals (tans, browns, reds, blacks, and more)
- It's fully water-resistant when properly sealed
- It can go over most tile surfaces without removal or demo
- My contractor had never used it — they learned from tutorials and manufacturer instructions
The total cost: under $2,000. About $1,000 in materials and $1,000 in labor for two days of plastering and one day of sealing.
Compare that to $13,000+ for a full retile. The math is not subtle.
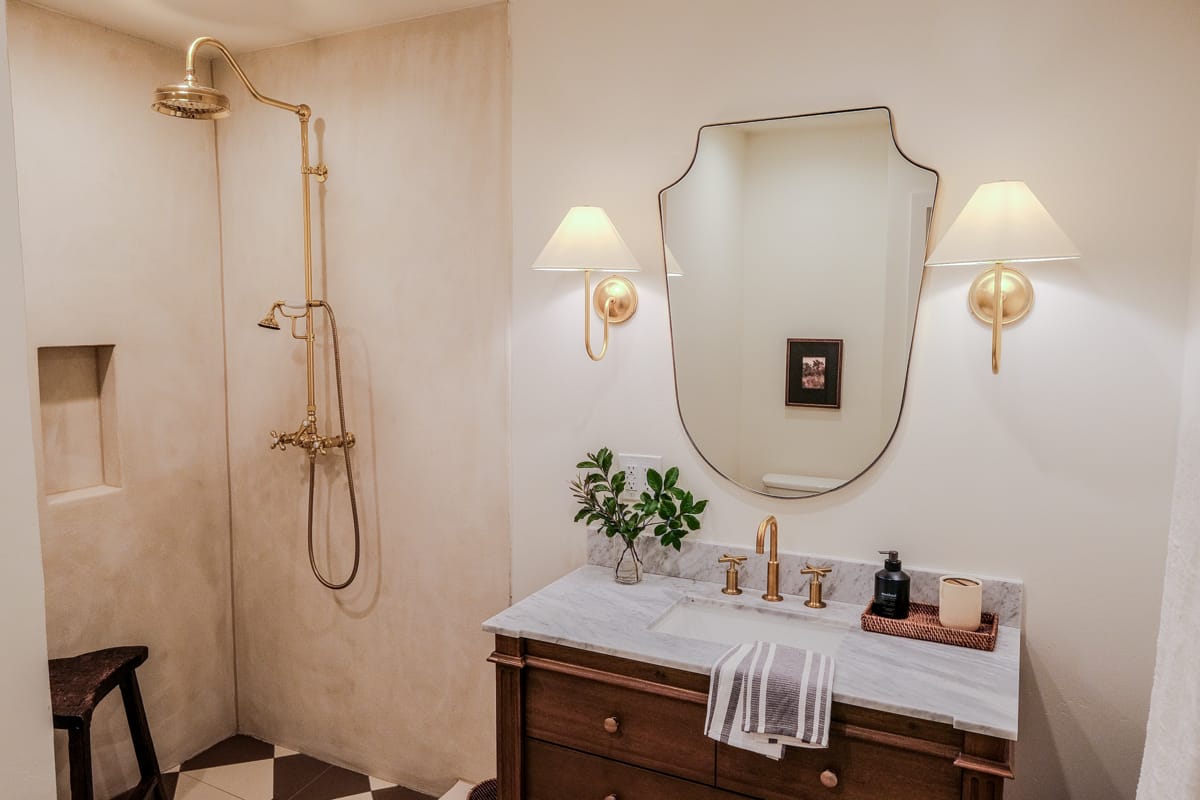
The Result
The bathroom that felt wrong became the bathroom I'd originally imagined. Clean. Calm. The kind of space that reads "intentional" without screaming for attention.
If I'd been on-site instead of managing this remotely, I'm confident I could have done the plastering myself and brought the whole project in under $1,000 total.
What to Take From This
Honest caveat: I am not a patient person. Waiting on larger samples, building a board, living with it for 48 hours — none of that comes naturally to me. I want to decide and move. This mistake is what happens when I do that. The pre-steps feel like friction until you're standing in a bathroom that costs $13K to fix. Then they feel like the only thing that mattered.
If you're mid-renovation and something feels off, here's the practical version:
- Before you start: Always get full-scale samples. Glue them to a board. Live with them under your actual lighting for 24–48 hours.
- If you've already made the mistake: Get a real quote for a redo before assuming it's your only option. Then look at overlay products like Concretta before you commit to demo.
- The broader principle: Most design mistakes are fixable. They're just not always fixable the obvious way.
The expensive solution is rarely the only solution. The point isn't to avoid all mistakes — it's to know what your options are when you make them.
One thing I couldn't tell you when I first published this: I've now had this installed for over two years. No peeling, no cracking, holds up fine with normal bathroom use. The durability concern I had going in turned out to be a non-issue.
Have questions about Concretta or tile overlays? Drop them in the comments.
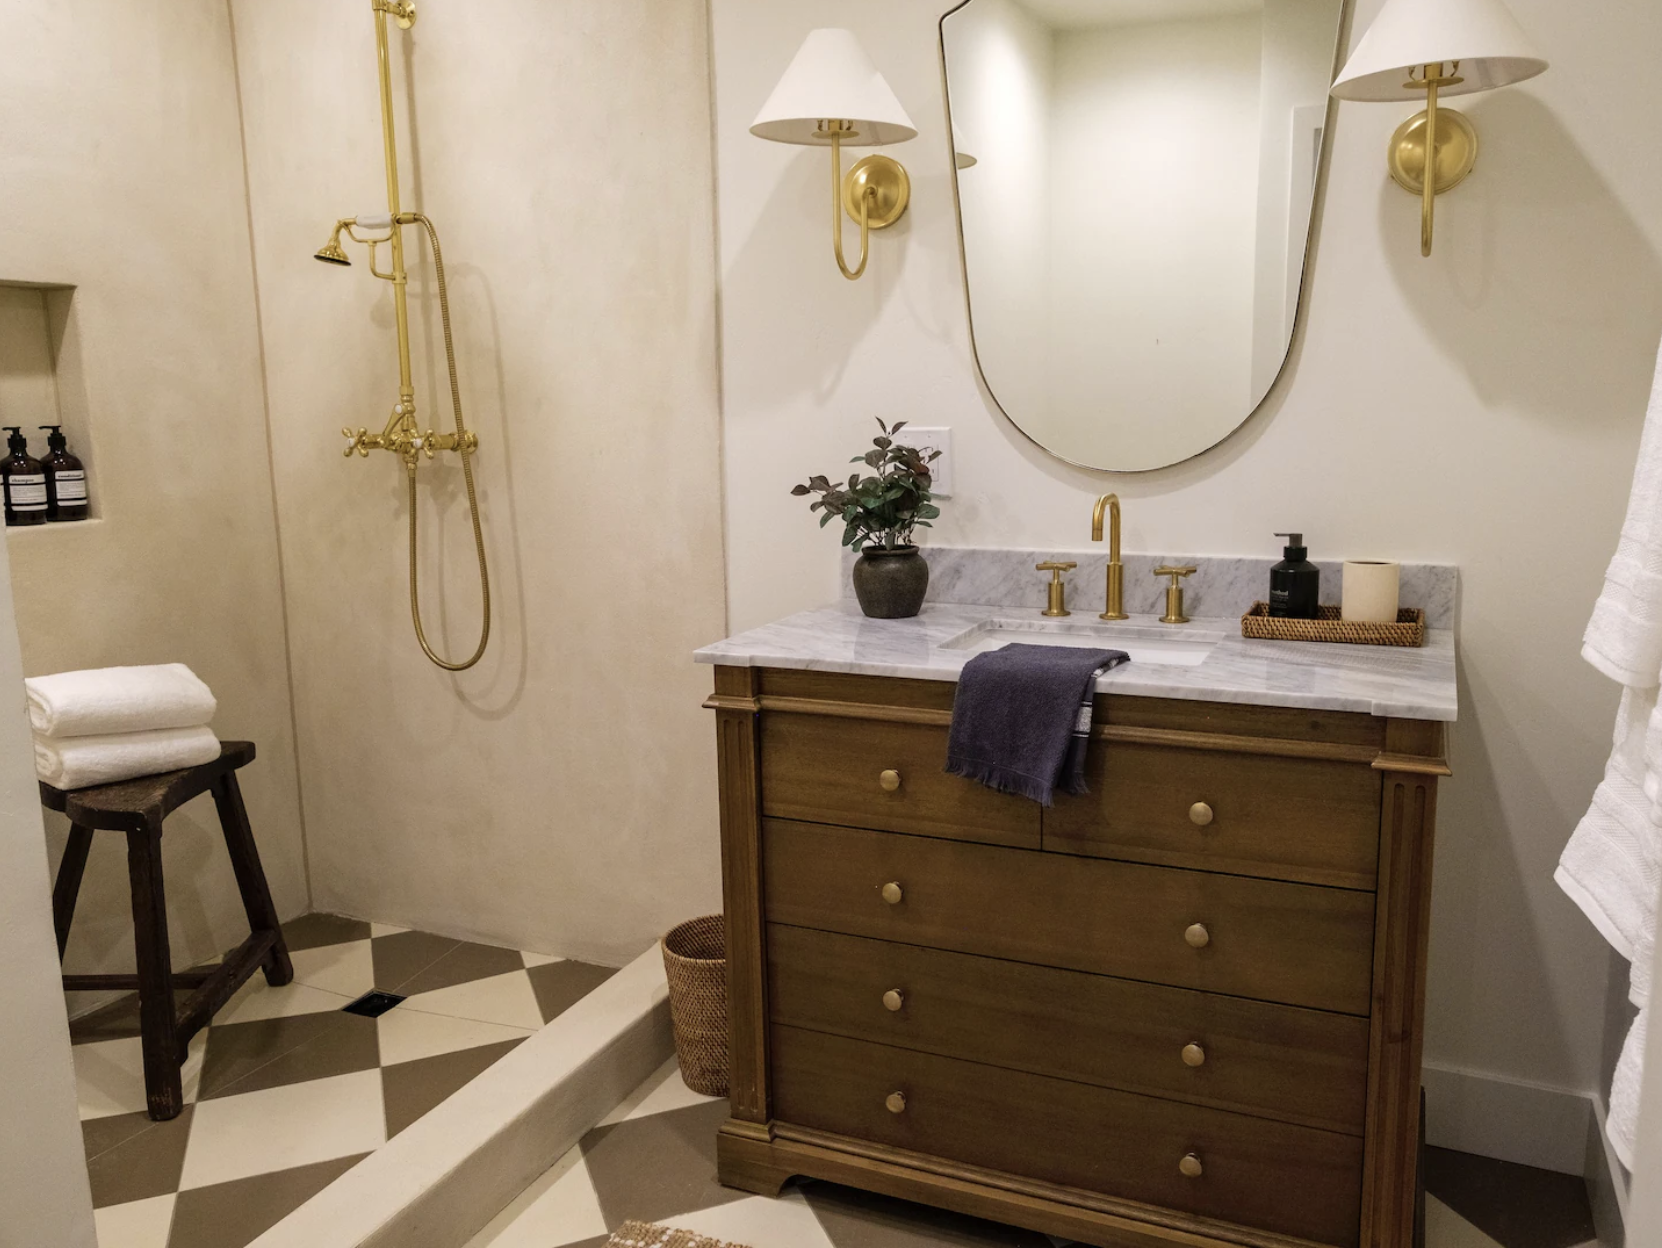
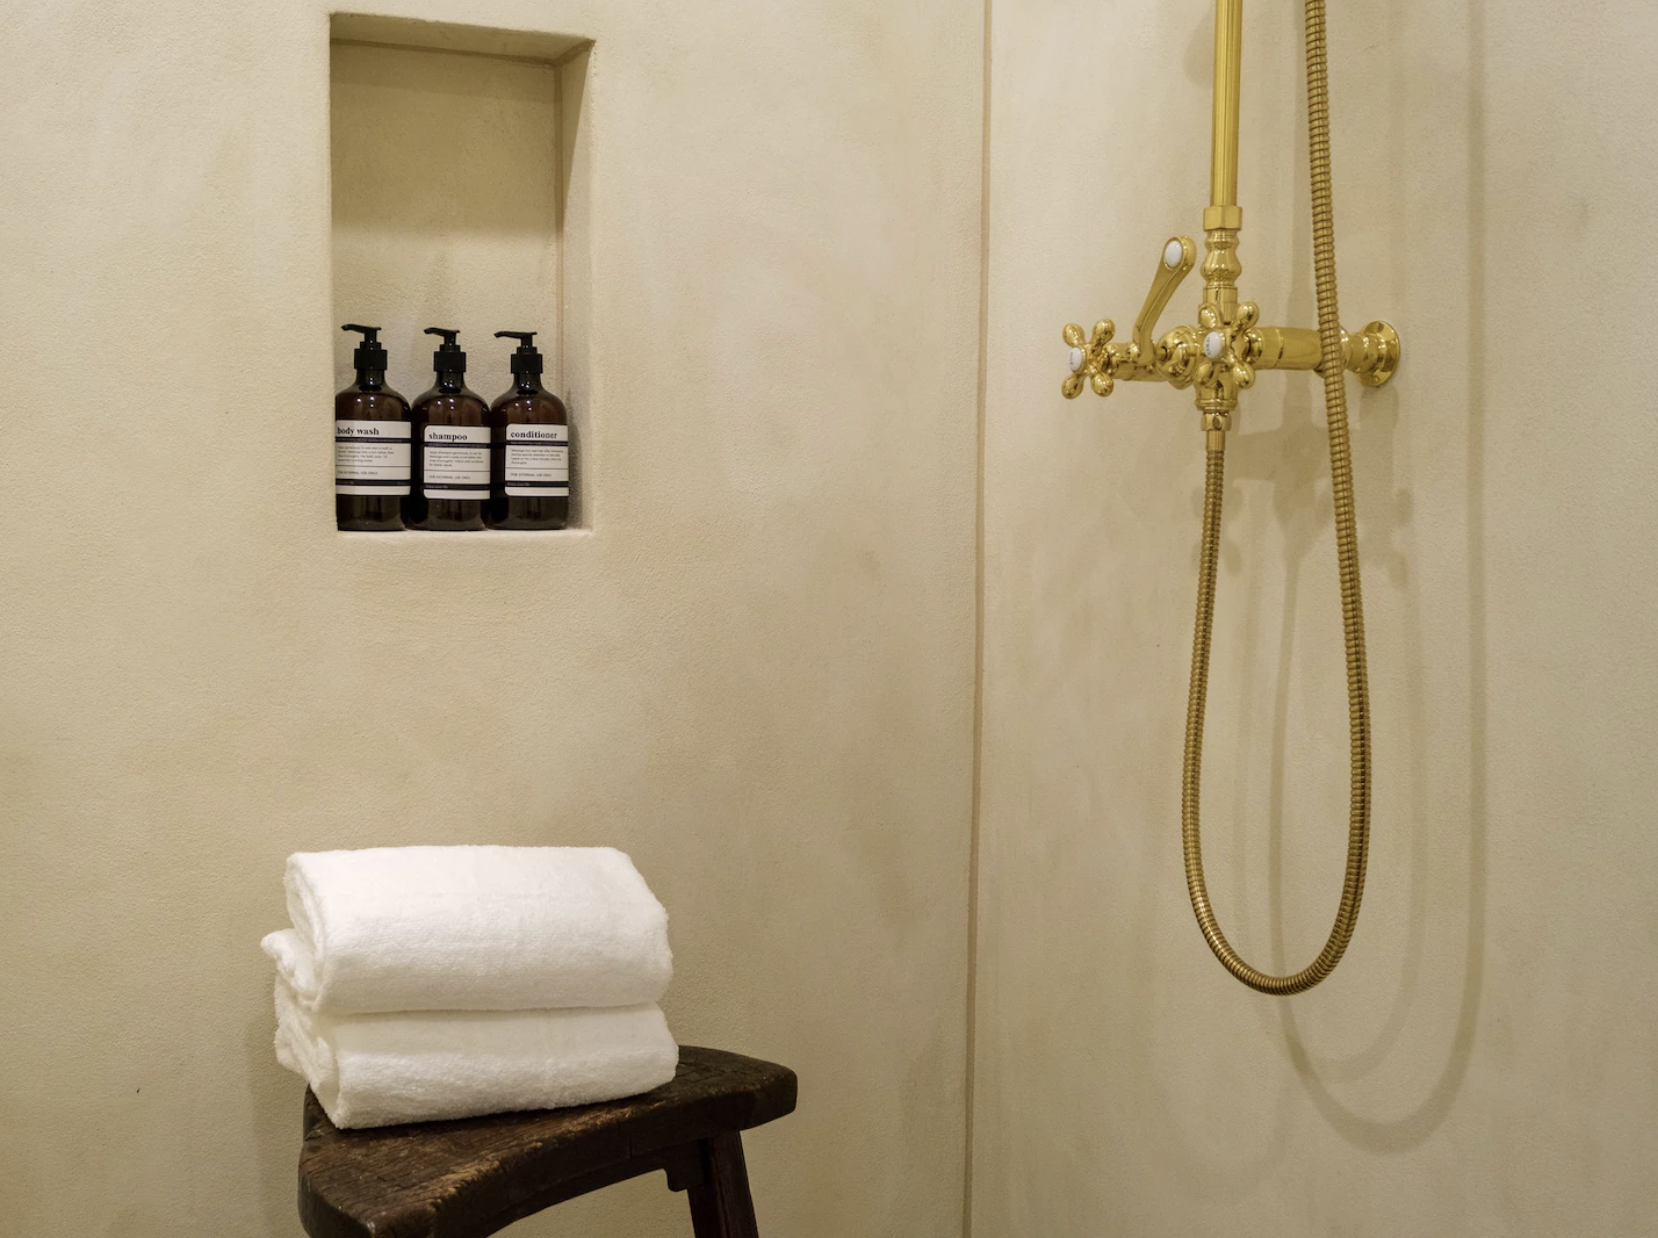
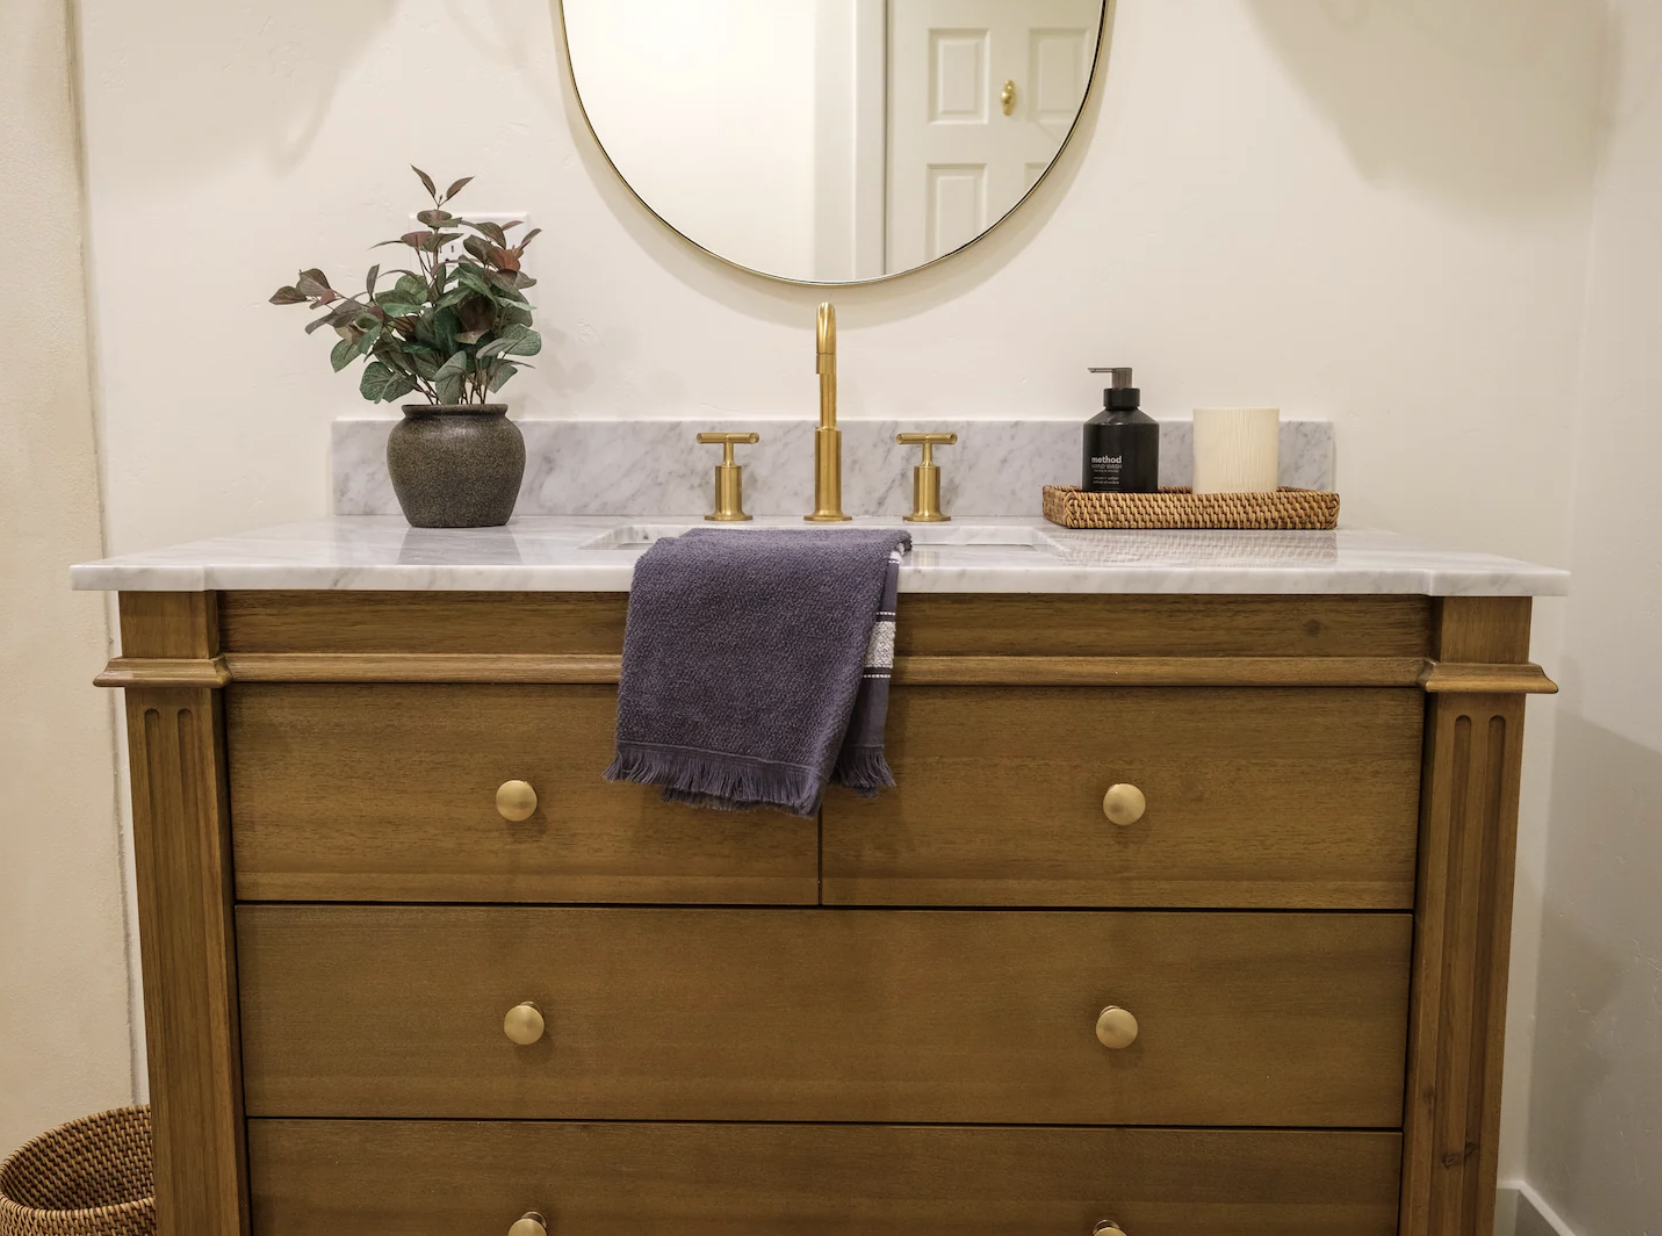
Tile: Concrete Collective (laguna in colors blonde + taupe), Plaster: Concretta Plaster in color Sandstorm (diluted 25%), Vanity: Birch LN Garza 42" Vanity in Light Brown, Sconces: Rejuvenation Crissey in Aged Brass + White Linen Shade, Mirror: CB2 Slim Polished Brass Mirror, Shower Fixture: Mason Hill Collection Exposed Cross Handle Shower Set by Randolph Morris in Polished Brass from Vintage Tub + Bath